Install
Timelinize is still in early development. You will encounter bugs and missing functionality. I hope you'll be patient with the development process and participate in the project. Thanks for being a part of it!
System requirements
- Operating system:
- macOS 14 or newer
- Windows 10 or newer
- Linux
- vips (for photo processing)
- ffmpeg (for video processing)
- uv (for semantic search)
- Recommended:
- GPU (NVIDIA 20-series or newer; 40-series for faster thumbnails) or Apple Silicon (M2 or newer)
- libheif if you have an iPhone
- 10+ GB free space for semantic/AI features
- Fast storage devices and data buses (SSDs over USB 3.1 Gen2+, NVME, PCIe 5+, etc.)
See the instructions below to help you get the dependencies installed for your platform.
Download
We recommend most users download the latest release for their platform. Only download development builds if you want the most recent patches (and bugs) that haven't yet been released.
Latest release (recommended) Development builds
Then be sure to follow the instructions below to run it.
Keep your source data. Because Timelinize is still in development, you will likely need to start over with a new timeline each time you run a new version.
Instructions
- Install libvips:
brew install vips - To process photos/videos from iPhones, install libheif:
brew install libheif - Install ffmpeg:
or
brew install ffmpegcurl https://webi.sh/ffmpeg | sh - Install uv:
curl -LsSf https://astral.sh/uv/install.sh | sh - Download Timelinize (see above) and extract the archive to expose the binary.
- We are not yet code-signed, so you will have to override the OS to run the app: follow these instructions to run apps from unidentified developers (that's me!).
Additional steps
Mac has a whole extra layer of kernel-level protections that go beyond posix-style file permissions, users, and groups, that will likely require additional steps:
- If you get an error that says Timelinize "is damaged," that's a lie: the checksums probably match; the real problem is that Apple has placed it in "quarantine" because it was downloaded. You can either:
- Do a two-finger ("right") click and select Open, twice (once for the warning, the second time to open it)
- Or, open Terminal and run this command:
(adjust path as needed).xattr -d com.apple.quarantine ~/Downloads/timelinize
- If you get errors when opening or creating a timeline, when planning an import, or right after an import starts, Apple is likely blocking access to your files (especially if the error is something like "operation not permitted"). The easiest way around this is to give Terminal explicit access in Settings -> Privacy & Security. For access to everything, find "Full Disk Access" and add/enable Terminal:
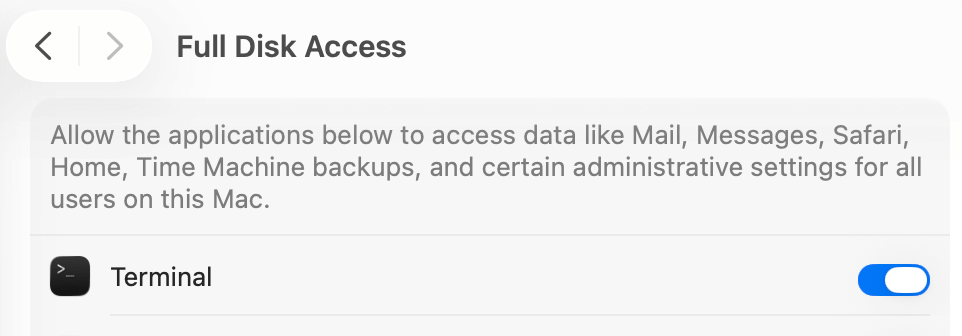 If you prefer, you can be more selective about what you grant access to by selecting more specific data instead, such as Photos, Contacts, or Files & Folders. Remember to grant it for Terminal, since Timelinize runs in the Terminal.